How to use the eduPrint printer
When you want to collect your print-out, make a copy or scan a document, you can simply go to any eduPrint printer at Uppsala University. There are two kinds of eduPrint printers, a smaller kind that only handles A4 and a bigger kind that can print and copy A3 as well as A4.
Select display language
When you come to the printer the display is set to Swedish or English. You can change language by pressing the globe and select your language in the list. The eduPrint system will remember your preferences. That means that the next time you log on to a printer it will automatically switch to this language, even if you go to another printer. The available languages are Swedish, English, Finnish, German, Spanish, Portuguese, Russian and Chinese.
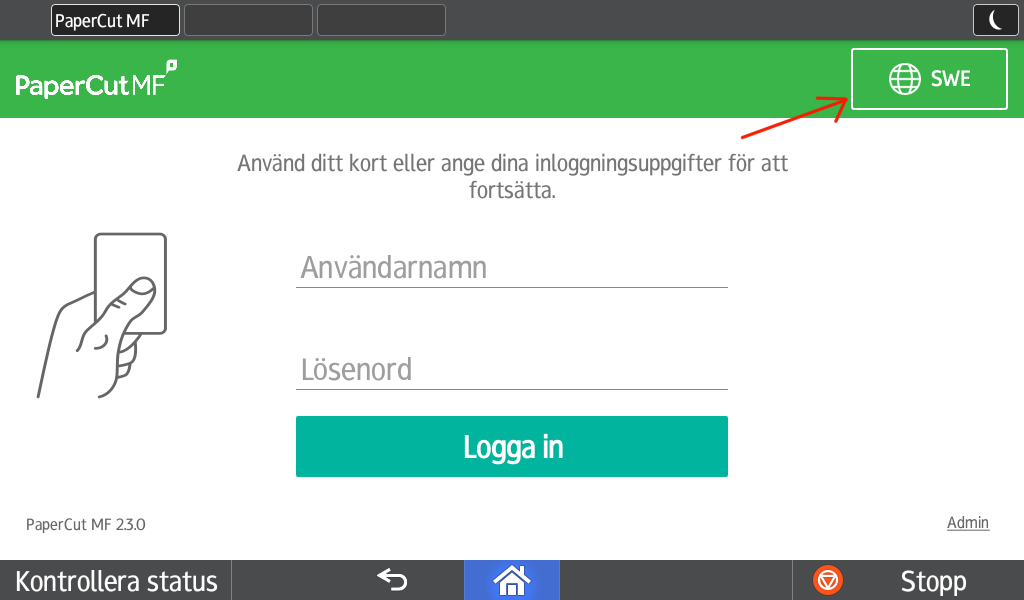
Image: The login screen on the printer, with the icon for selecting language in the upper right corner.
Log on to the printer
To use an eduPrint printer you have to log on using your student account and password A, or by placing your campus card on the card reader. The first time you place your card at the reader, the printer asks you to enter username (your student account) and password (password A). In this way the system connects your campus card to your account. That means that you won't have to re-enter your username or password the next time you need to log on to an eduPrint device.
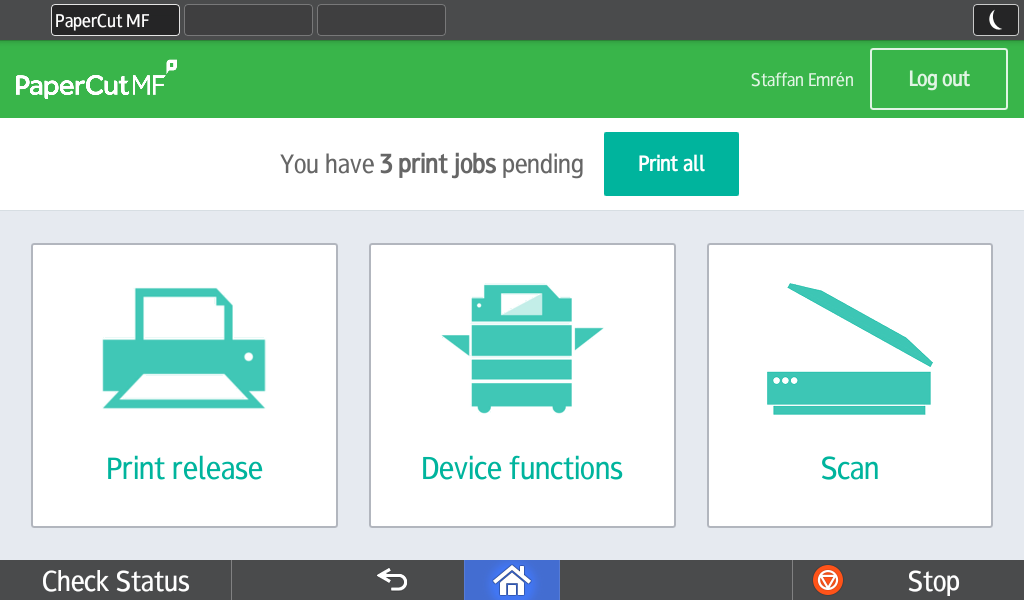
Image: This is what the printer screen displays after logging in.
Collect your print-outs
To collect you print-outs, press the button "Release print jobs" after logging on to the printer. Print all documents at once as they are, or select which documents to print and which to keep in the queue. You can also choose to modify your print order from single sided to double sided and from colour to black and white (but not the other way around).
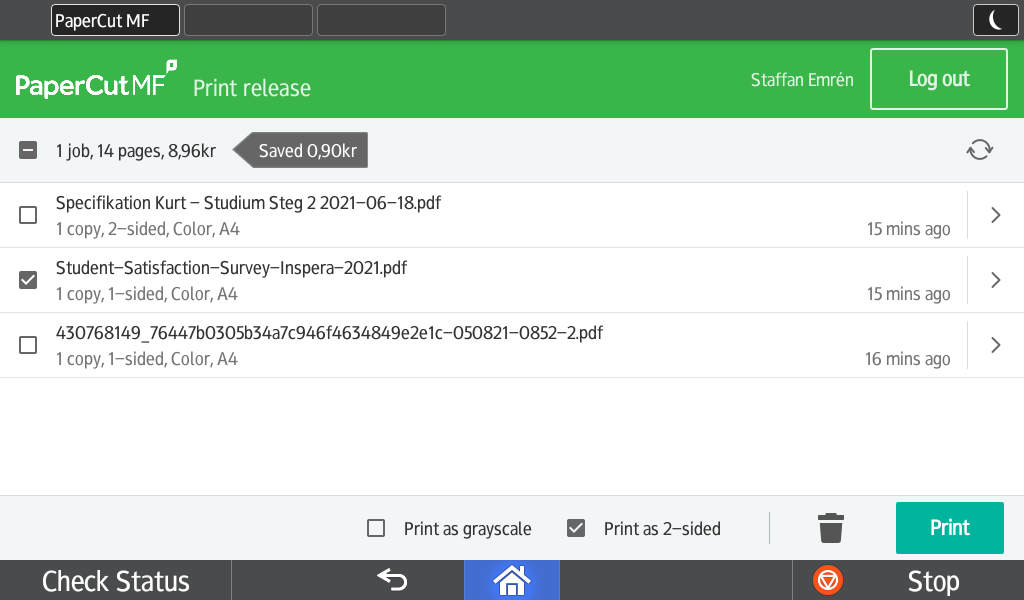
Image: The printer screen, showing print jobs that can be collected; one is selected and switched to double sided.
Copying
When you need to copy a document, you press the button "Device functions". When your account balance is shown you press the little house at the bottom of the display. Then you press the "Copier" button, select your settings for copying and press "Start".
Scanning
When scanning documents, you can choose to have the printer send your documents via email or store them in any of the supported cloud storage services. You can also choose to add OCR interpretation to your documents. OCR (Optical Character Recognition) makes it possible to search, select and copy the text in your documents.
After logging on to the printer, press the button "Scan". You will then see the following screen where you choose where to send your scanned document.
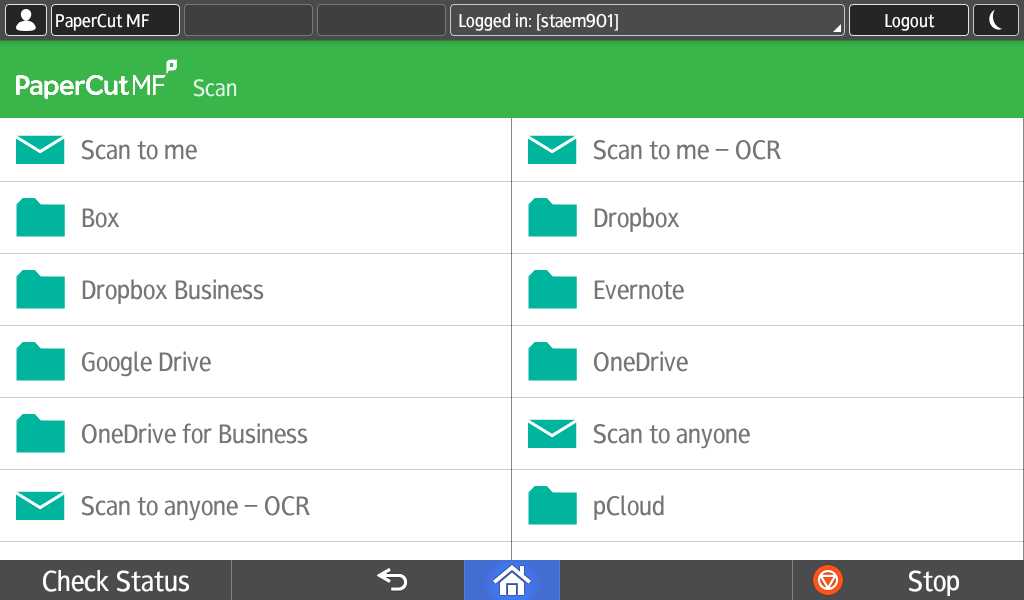
Image: The printer screen, showing where you choose where to send your scanned documents.
- "Scan to me" will send your document as an e-mail attachment to your student email.
- "Scan to me - OCR" is the same as "Scan to me", adding OCR-interpretation to your document.
- "Scan to anyone" will send your document as an e-mail attachment to any recipient you enter. The e-mail will be sent from your student email address.
- "Scan to anyone - OCR" is the same as "Scan to anyone", adding OCR-interpretation to your document.
- If you choose one of the cloud storage options, your document will be stored in that cloud storage.
- The first time you use this option, you will receive an email that asks you to authorize that PaperCut can access your cloud storage service. PaperCut is the software that powers eduPrint. Click the green login-button in the mail, log on to your cloud storage service and authorize access. PaperCut does not store your password, instead it creates what is called an access token that lets eduPrint access your account. This access token can only be used by PaperCut and only from the eduPrint server where PaperCut is running.
Please note that all email systems have limits on how large documents they receive are allowed to be. If your documents don't reach the recipient, please try splitting up the document in smaller parts, decreasing the resolution or changing from colour to grayscale. Scanning to a cloud storage service does not involve this limitation, so if you are scanning large documents it is recommended that you use a cloud storage service.
Processing of your personal data
When you select OCR, your documents are processed by Google in Germany. By selecting OCR you give your consent to let Google process your personal data in order to deliver the OCR interpretation and other related services.
The same conditions apply when you choose to store your documents in one of the cloud storage services provided. You will also need an account in the cloud storage where you choose to store your documents.
Read more about the General Data Protection Directive at Integritetsskyddsmyndigheten. Information about how the different cloud storage services process your personal data can be found at the respective cloud storage provider.